SMT Soldering techniques, tools, and best practices

Surface Mount Technology (SMT) soldering is key to making modern electronics. It helps attach small parts directly to circuit boards. This creates smaller and better designs. Learning this skill ensures accuracy and dependability in your projects.
SMT soldering is popular because it is fast and can grow with demand.
Whether you are a beginner or an expert, knowing SMT soldering tools and methods can improve your skills and make your work better.
Key Takeaways
- Use the right tools for SMT soldering. A good soldering iron with adjustable heat helps you work better.
- Pick the correct solder and flux for your project. Lead-free solder is safer for the planet and works well.
- Learn proper soldering steps. Clean the board, use flux, and heat carefully for strong connections.
- Avoid mistakes by keeping tools clean and checking joints often. This improves quality and reduces problems.
- Stay safe while soldering. Wear gloves, goggles, and work in a place with fresh air to avoid fumes and burns.
Essential Tools and Materials for SMT Soldering
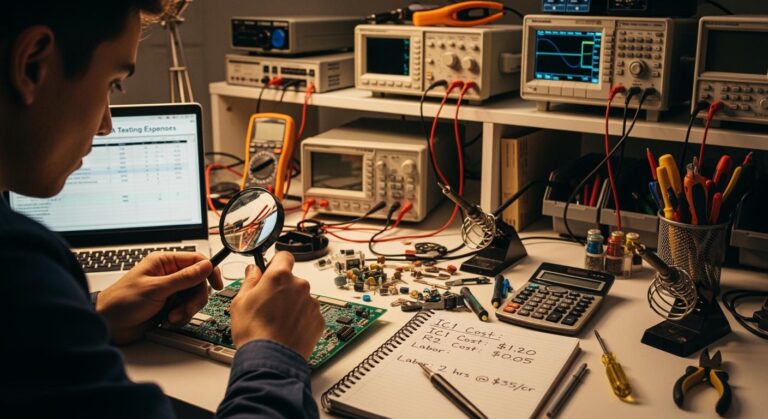
To do SMT soldering, you need the right tools and materials. These tools help you work accurately and efficiently. They are especially important for tough jobs like automotive and medical PCBs. Below is a list of the most important tools and materials.
Soldering irons and stations
A soldering iron is a basic tool for SMT soldering. It heats and melts solder to connect parts to the PCB. For more precise work, a soldering station is better. It gives more control and works well for professional tasks.
| Specification/Feature | Description |
|---|---|
| Temperature Control | Soldering stations let you adjust the heat as needed. |
| Heat Response | Advanced stations recover heat faster after soldering. |
| Maximum Temperature | Stations can reach 900°F, but 750°F works for lead-free solder. |
| Tip Life | High heat can wear out tips faster, affecting performance. |
When picking a soldering iron or station, choose one with adjustable heat. This helps you use different solders without harming parts. Also, check heat recovery and tip life for better results and durability.
Types of solder and solder paste
Solder and solder paste attach parts to the PCB. Picking the right type ensures strong connections. Solder comes in two types: lead-based (SnPb) and lead-free. Lead-based solder is easier to use, but lead-free is safer for the environment and follows rules.
Solder paste is a mix of powdered solder and flux. It holds parts in place before reflow soldering. Lead-free pastes have improved a lot in the last 15 years, while SnPb pastes have stayed the same. For example:
| Test Aspect | Findings |
|---|---|
| Solder Paste Formulations | Lead-free pastes have advanced, but SnPb pastes have not. |
| Aperture Design | Special designs reduce solder paste issues like mid-chip balls. |
| Printability | Certain designs work better for small parts like 0402 components. |
| Foil Thickness | Thinner foils, like 4 mil, cause fewer defects for tiny parts. |
For automotive and medical PCBs, lead-free solder paste is often the best. It creates strong, reliable connections even in tough conditions.
Flux: Purpose and types
Flux is important in SMT soldering. It cleans parts and PCBs, helping solder stick better. It removes rust and stops further damage during soldering. There are three main types of flux:
- No-clean flux: No cleaning is needed after soldering. It saves time and is common in electronics and cars.
- Water-soluble flux: Easy to clean and eco-friendly. It’s great for jobs needing clean PCBs, like medical devices.
- Rosin-based flux: Traditional but effective. It’s used for high-quality soldering in medical and car systems.
Choose flux based on your project needs. For example, no-clean flux is good for mass production, while water-soluble flux is better for clean-critical tasks.
Tip: Work with experts and use proven tools to improve your SMT soldering. Also, use quality checks like AOI and X-ray testing to ensure your PCBs are top-notch.
Extra Tools: Tweezers, Magnifiers, and Hot Air Stations
For SMT soldering, accuracy is very important. Extra tools help handle tiny parts and improve soldering. Tweezers, magnifiers, and hot air stations are must-haves for great results.
Tweezers: Handling Tiny Parts
Tweezers help you pick up and place small parts easily. They come in different shapes like straight, angled, or fine-tip. Anti-static tweezers protect sensitive parts from damage. Stainless steel tweezers last long and resist rust.
Tip: Use angled tweezers for tight spaces on crowded boards. This gives better control and avoids dropping parts.
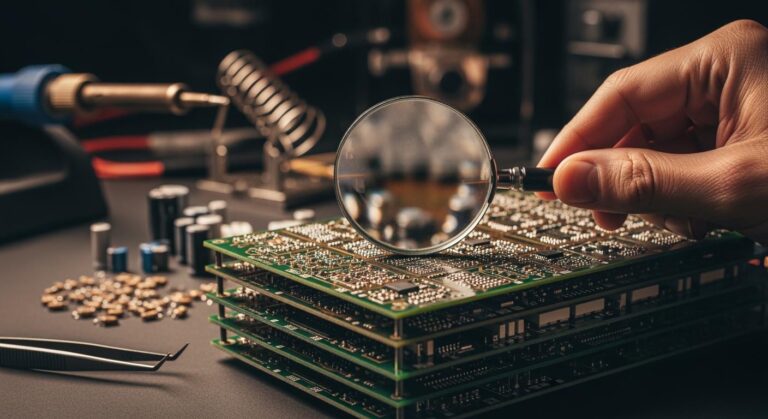
Magnifiers: Better View for Small Details
Magnifiers let you see tiny parts and solder joints clearly. They reduce eye strain and help check your work. Options include handheld magnifiers, desk lamps with magnifiers, or head-mounted ones.
| Type of Magnifier | Features |
|---|---|
| Handheld Magnifiers | Easy to carry, good for quick checks. |
| Desktop Magnifying Lamps | Hands-free use with adjustable lights for clear focus. |
| Head-Mounted Magnifiers | Wearable for close-up work, great for detailed tasks. |
Magnifiers with LED lights help in dim areas. They make it easier to spot mistakes and fix them quickly.
Hot Air Stations: Fixing and Soldering Made Easy
Hot air stations are useful for advanced soldering. They blow hot air to melt solder, making it simple to attach or remove parts. These tools are great for fixing mistakes and reflow soldering.
Look for stations with adjustable heat, airflow settings, and changeable nozzles. These features let you work on different boards and parts.
Note: Practice on old boards before using the hot air tool on real projects. This helps you learn to control heat and air without damaging parts.
Using these tools improves your soldering skills. They work well with your soldering iron and flux, ensuring top-quality results every time.
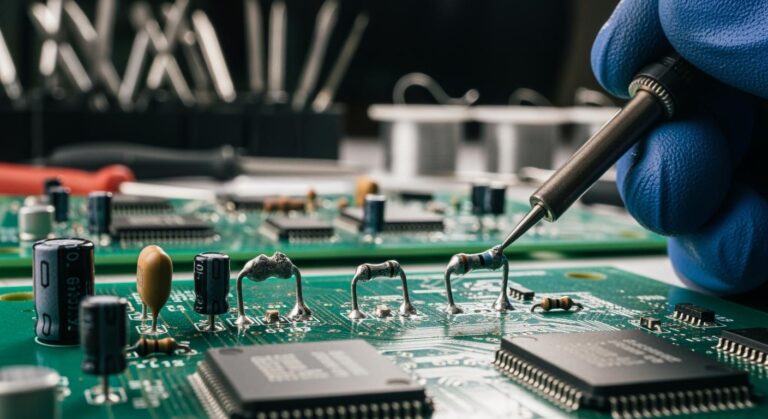
Basic SMT Soldering Techniques

Learning basic SMT soldering methods is important for making strong PCB connections. These methods are the base of soldering and help create good-quality joints.
Getting the soldering iron ready: Tinning and cleaning
Preparing your soldering iron is the first step for good results. Cleaning and tinning the tip improve heat transfer and stop rust. Follow these simple steps:
- Use a brass brush to clean the tip. This removes rust and makes it ready for tinning.
- Heat the soldering iron to about 600°F (315°C). This is hot enough to melt solder but safe for the tip.
- Cover the tip with solder. This is called tinning and helps the iron work better.
- Wipe the tip on a damp sponge to remove extra solder. Repeat until the tip is fully coated and clean.
- After each use, re-tin the tip before putting the iron away. This keeps the tip in good shape.
- Use the lowest heat needed during soldering. Turn off the iron when not using it to avoid damage.
Tip: Take care of your soldering iron regularly. This keeps it working well and avoids problems.
Using heat correctly and at the right time
Using the right heat at the right time is key for strong solder joints. Too much heat can harm parts, and too little heat makes weak connections. Follow these tips:
- Let the solder paste melt during the soak phase. This takes 60-120 seconds and heats the PCB evenly.
- Slowly raise the soak zone temperature from 120°C to 160°C. This stops sensitive parts from breaking due to sudden heat.
- Don’t overheat, as it can cause problems like solder bridges or gaps. Not enough heat can lead to bad solder flow.
Controlling heat is very important for PCBs used in cars and medical devices. These need to be reliable and long-lasting.
Note: A soldering station with adjustable heat settings helps you control the temperature better.
Easy steps to make good solder joints
Making great solder joints needs careful work and following steps. Use this guide for consistent results:
| Step | What to Do |
|---|---|
| 1 | Clean the PCB and parts to remove dirt or grease. Use alcohol for cleaning. |
| 2 | Add flux to the soldering area. This helps solder stick and flow well. |
| 3 | Place the part on the PCB. Use tweezers for small parts. |
| 4 | Heat the soldering iron to the right temperature. Make sure the tip is clean and tinned. |
| 5 | Touch the iron tip to the joint area. Heat both the part lead and PCB pad. |
| 6 | Add solder to the joint. It should flow smoothly and form a neat shape. |
| 7 | Remove the iron and let the joint cool. Don’t move the part while cooling. |
| 8 | Check the joint for problems like gaps or extra solder. Fix if needed. |
For more help, check guides like Soldering / Brazing / Welding and 7.1.1 Soldering Basics. These have detailed steps and pictures to improve your skills.
Tip: Practice on old PCBs before working on important projects. This builds confidence and sharpens your soldering abilities.
Avoiding common mistakes in soldering
Mistakes during soldering can cause weak connections or damaged parts. Knowing these errors and how to fix them helps improve your work. Below are common mistakes and ways to avoid them.
Common Soldering Errors and Solutions
Many problems happen due to bad technique or wrong tools. The table below shows common mistakes and fixes:
| Common Soldering Errors | Corrective Strategies |
|---|---|
| Insufficient solder | Check solder joints during the process |
| Excessive solder | Use tools to spot and fix extra solder |
| Cold solder joint | Adjust heat settings for better solder flow |
| Tombstone effect | Use the right solder size and tip for each part |
| Defective solder joints | Clean and maintain tools regularly |
Fixing these mistakes makes your soldered connections stronger and more reliable.
Tips to Avoid Soldering Mistakes
Follow these tips for better results:
- Clean the surface before soldering. Dirt stops solder from sticking.
- Pick wire solder that matches the size of your parts.
- Use a soldering tip that fits the pad and component.
- Choose the right solder and flux for your project.
- Keep your soldering tip clean and coated with solder.
- Set the temperature high enough to melt solder but not damage parts.
- Heat both the lead and pad until they are ready for solder.
- Add just enough solder to cover the pad and lead neatly.
- Trim leads carefully without harming the solder joint.
- Remove leftover flux using a good cleaner.
Tip: Practice on old boards to improve your skills before working on important projects.
Avoiding Specific Issues
Some problems need extra care. Cold solder joints happen when solder doesn’t melt fully, making weak connections. To stop this, keep your soldering iron at the right temperature. The tombstone effect, where parts lift off the PCB, can be avoided by using the correct solder size and tip.
Taking care of your tools is also important. Dirty or worn-out tips can cause bad joints. Clean and coat your tip often to keep it working well.
By following these steps and paying attention to details, you can avoid mistakes and make strong, high-quality solder joints.
Advanced SMT Soldering Techniques
Soldering tiny parts in surface mount technology
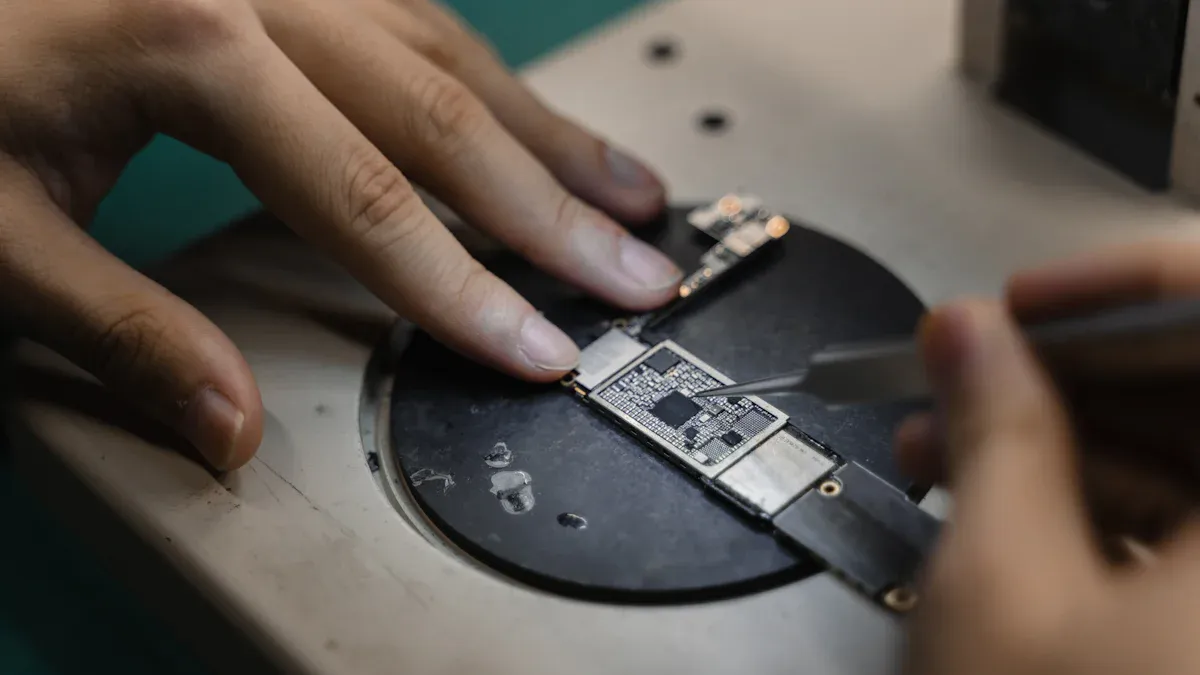
Soldering tiny parts needs care and steady hands. Small components like 0402 or 0201 are tricky to handle. Make sure your workspace is bright and has magnifiers or microscopes. These tools help you see the small details of the parts and PCB.
To solder, put a little solder paste on the PCB pads. Use tweezers to place the part correctly. Heat the joint with a fine-tip soldering iron or hot air tool. Let the solder flow smoothly for a strong bond. Don’t overheat, as it can harm the part or PCB.
Tip: Practice on old boards first. This builds confidence and improves your skills before working on important projects.
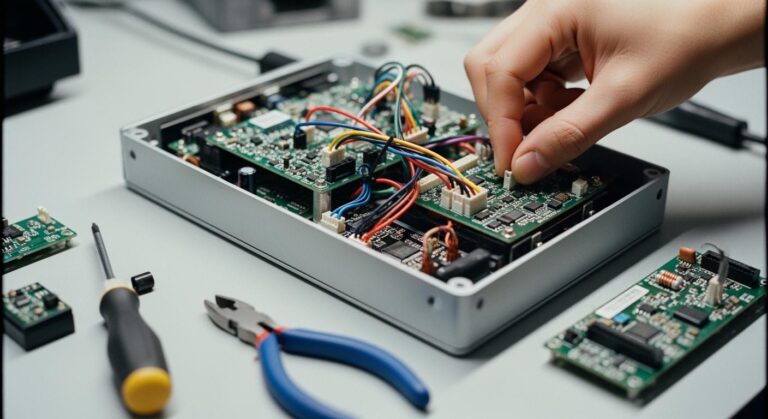
Safe ways to remove parts (desoldering)
Taking parts off safely is just as important as soldering them. Desoldering helps fix mistakes or replace bad parts without harming the PCB. Use tools like desoldering pumps, solder wick, or hot air stations.
For through-hole parts, use a desoldering pump. Heat the solder joint, then quickly suck up the melted solder with the pump. For surface-mounted parts, a solder wick works better. Place the wick on the joint, heat it, and let it soak up the solder. A hot air station is best for bigger or complex parts. It heats the solder evenly, so you can gently lift the part with tweezers.
Note: Clean the PCB after desoldering. Remove leftover solder or flux for a smooth surface to re-solder.
Fixing mistakes with rework techniques
Rework fixes soldering mistakes and makes your PCB reliable. Common tasks include replacing bad parts, fixing weak joints, or repairing broken traces. Following proper steps ensures good results.
The IPC-7711/7721 guidelines explain how to rework and repair electronics. These rules cover soldering, desoldering, fixing conductors, and checking work after rework. The table below shows key rework steps:
| Protocol | Description |
|---|---|
| IPC-7711/7721 | Detailed rules for fixing or changing electronic assemblies. |
| Rework | Fixing problems like replacing bad parts on finished boards. |
| Repair | Fixing physical damage like broken traces or lifted pads. |
| Techniques | Includes soldering, desoldering, fixing conductors, and inspections. |
To rework, find the problem first. Use tools like magnifiers or X-rays to spot defects. Remove the bad part using desoldering tools, clean the area, and add fresh solder paste. Place the new part and reflow the solder with a hot air tool or soldering iron. Check the joint to ensure it’s done right.
Tip: Keep notes of your rework steps. This helps track changes and keeps your projects consistent.
Using hot air tools for reflow soldering
Hot air tools are important for reflow soldering with surface mount parts. They heat solder paste evenly, making strong connections between parts and the PCB. Learning to use them well can improve your soldering results.
First, pick a hot air station with adjustable heat and airflow. This lets you work on different parts without causing damage. Use the right nozzle size for your task. Small nozzles focus heat on tiny areas, while large ones spread heat over bigger spaces.
Apply solder paste to the PCB pads. A stencil helps for precise application, especially with small parts. Place the parts on the paste using tweezers. Align them carefully to avoid fixing mistakes later. Set the hot air tool to the correct temperature for your solder paste. For lead-free solder, this is usually 240°C to 260°C.
Hold the hot air tool about 1-2 inches above the PCB. Move it in circles to spread heat evenly. Watch as the solder paste melts and creates solid joints. Don’t overheat, as it can harm parts or the PCB. After cooling, check the joints for any problems.
Tip: Practice on old boards to improve your skills. This helps you avoid errors on important projects.
Using hot air tools takes time and care. With practice, you can make high-quality solder joints every time.
Safety Precautions and Best Practices
Keeping the air clean while soldering
Good airflow is very important when soldering. Soldering makes fumes that can have harmful stuff like flux and lead. Without fresh air, these fumes can build up and be dangerous. Always work in a space with good ventilation or use a fume extractor. A fume extractor pulls in bad air and filters it, keeping your workspace safe.
Taking safety steps helps avoid problems during SMT soldering. Tools like monitors can spot dangers early and stop accidents. Using machines instead of hands reduces contact with harmful fumes. Learning about ventilation keeps you safe and helps you follow rules.
Tip: Place the fume extractor close to where you solder for better results.
Wearing safety gear: Gloves, goggles, and masks
Safety gear protects you from getting hurt while soldering. Gloves keep your hands safe from burns, cuts, and chemicals. Goggles protect your eyes from sparks and bright light. Masks help you breathe clean air by blocking harmful fumes.
| Safety Item | Purpose |
|---|---|
| Eye and Face Protection | Glasses or shields protect your eyes from bright light and flying bits. |
| Hand Protection | Gloves stop burns, cuts, and chemical exposure while soldering. |
Choose gloves based on your task. Heat-resistant gloves are good for hot work, while chemical-resistant ones block harmful substances. No single glove works for every danger, so pick the right one.
Note: Check your safety gear for damage before using it.
Staying safe from burns and injuries
Soldering uses high heat, so burns are a big risk. Be careful with the soldering iron and always put it back on its stand when not using it. Don’t touch the hot tip or freshly soldered parts. Use tweezers or tools to hold small pieces instead of your fingers.
Tools like monitors can warn you if something gets too hot. Machines can also do some tasks, so you don’t have to touch hot tools. Following safety rules and staying focused helps prevent accidents.
Tip: Keep a first-aid kit nearby to quickly treat small burns.
Taking Care of Soldering Tools for Long Use
Keeping your soldering tools in good shape helps them last longer. Skipping maintenance can cause bad soldering and make you replace tools often. Simple steps can keep your equipment working well.
Clean the soldering tip often
The soldering tip is very important. A dirty tip doesn’t heat well and makes soldering harder. After each use, clean the tip with a damp sponge or brass cleaner. Don’t use rough materials that might harm the tip. Add a little solder to the tip after cleaning to stop rust and make it ready for next time.
Check and change worn-out parts
Using tools a lot can wear out parts like tips, heaters, or cords. Look at these parts often to see if they are damaged. Replace old tips quickly to keep your work precise. If the heater isn’t working right, change it to avoid problems while soldering.
Store tools the right way
Storing tools properly keeps them safe from dust, water, and damage. Turn off and unplug your soldering station after using it. Let it cool down before putting it in a dry, safe spot. Cover delicate parts like the soldering tip to protect them.
Adjust temperature settings
Over time, soldering stations might not heat correctly. Check and fix the temperature settings now and then. This is very important when working with parts that need exact heat levels.
Taking care of your soldering tools helps you get good results. It also saves money by avoiding repairs or buying new tools. A little effort keeps your tools in top shape.
Getting good at SMT soldering needs the right tools and care. Using quality soldering irons, flux, and magnifiers helps make strong connections. Practicing both simple and advanced methods improves your skills and avoids mistakes. Staying safe with good airflow and safety gear keeps your workspace safe and easy to work in.
Good soldering has many advantages. Smaller parts save space and make boards lighter. Machines can assemble parts faster, saving time. Fewer solder joints mean fewer problems, and using less material lowers costs.
| Benefit | What It Means |
|---|---|
| Saves space | Tiny parts let you fit more on a board. |
| Speeds up assembly | Machines can quickly put parts together. |
| More reliable | Fewer joints mean fewer chances of breaking. |
| Lighter boards | Small parts make the board weigh less. |
| Saves money | Costs less to make and assemble. |
Being precise is key to great soldering. Each joint matters for how well your board works. Practice often to get better, and you’ll make strong, reliable boards every time.
FAQ
How should you clean a soldering iron tip?
Wipe the tip with a damp sponge or brass cleaner after use. Add a little solder to the tip to stop rust. Cleaning often helps the tool heat better and last longer.
How can you stop cold solder joints?
Make sure the soldering iron is hot enough. Heat the part lead and PCB pad evenly before adding solder. This makes strong connections.
Can solder paste be reused after opening?
Yes, but keep it sealed in a cool, dry spot. Check the expiration date before using it. Old paste might not work well and could cause problems.
What safety steps should you take while soldering?
Work in a space with good airflow or use a fume extractor. Wear gloves, goggles, and a mask to stay safe from burns, fumes, and flying bits. Be careful with hot tools.
How do you fix solder bridges on a PCB?
Use a solder wick or pump to take away extra solder. Add solder again carefully, leaving space between parts. This avoids short circuits and makes the board work better.