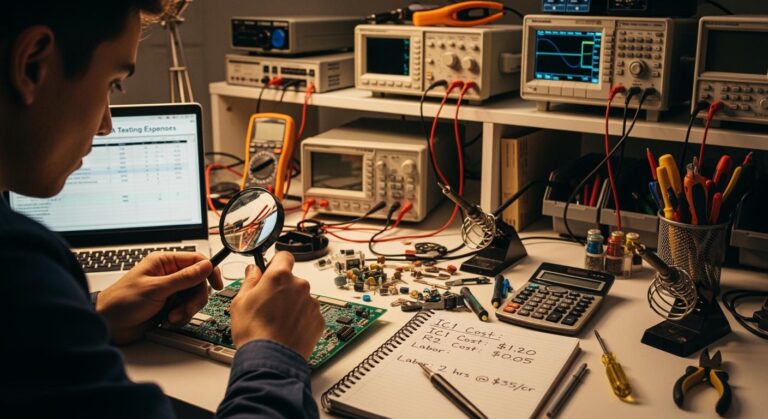
You need to check every part of your assembly process. The table below explains why tracking every cost is important for your budget:
| Importance of BOM Cost | Description |
|---|---|
| Pricing and Profit Margin | BOM cost changes how much it costs to make things and helps set the product price. |
| Identification of High-Cost Materials | BOM analysis finds materials that cost a lot and helps lower buying costs. |
| Early Cost Structure Grasp | Good BOM management finds strange costs early and stops extra spending. |
| Standardization of Materials | BOM data helps teams use the same materials and save money. |
| Risk Management | BOM monitoring helps make backup plans if the market changes. |
| Testing and Quality Control Costs | Testing costs make sure the product is good and must be in your budget. |
Key Takeaways
- Find all testing methods you need for your PCB assembly. This helps make sure your boards are good and follow the rules.
- Add up costs for materials, labor, and equipment. This helps you make a clear budget for your PCBA testing costs.
- Make your board design simpler to lower how hard it is to build. This can help you spend less on making and testing your boards.
- Order more boards at once to share setup costs over many units. This makes each board cost less to make.
- Use software tools to watch and change your costs often. This helps you stop surprise costs and keep your budget safe.
Key Factors Influencing PCBA Testing Cost

Test Types and Their Impact
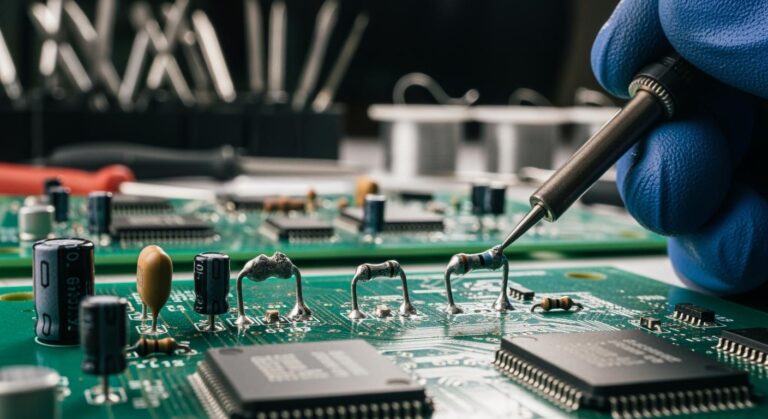
You have to pick the right testing methods for your pcb assembly. In-circuit testing and functional testing are used a lot. In-circuit testing finds problems early in the process. This helps you save time and money by catching mistakes before more work is done. Functional testing checks if your product works the way it should. It usually costs more because it needs special setups and skilled people. If you use both tests, you get better quality control, but your total cost goes up.
Board Size and Complexity
The size and how complex your pcb is will change the cost. Bigger boards need more materials and take longer to test. If your design has many layers or parts on both sides, it needs extra steps and better equipment. These things make setup and testing cost more.
Component Count and Material Quality
How many parts you use and the quality of materials matter a lot. More different parts mean higher costs and more time for machines to place them. Better materials make your board last longer but also cost more. If you use special parts or need extra checks, your costs will go up.
Quantity and Batch Size
How many boards you order changes the price. If you order a lot, setup costs are spread out, so each board costs less. Small orders or prototypes cost more per board because setup and testing fees stay the same. Some testing, like flying probe, is good for small orders since it needs less money at the start.
| Impact Factor | Description |
|---|---|
| Volume and Scale | More boards make setup costs less for each one; small batches cost more. |
| Reduced Inspection Fees | Some companies give lower prices for testing big batches. |
| Testing & Inspection Costs | AOI, ICT, X-ray setup fees; fixture design; per-board test charges. |
Equipment, Fixtures, and Tooling
You need to plan for equipment and fixture costs in your project. A simple fixture can cost less than $2,000. A professional one can cost up to $3,500. Setting up a full test station can cost from $5,000 to $12,000. These costs are higher for big or complex boards. Important parts include test probes, fixture bases, and software.
Labor and Engineering Fees
Labor and engineering fees add to your total cost. Skilled workers are needed for testing and checking quality. Labor costs change depending on where you are. For example, pay is lower in China than in the USA. Engineering fees for design checks and setup can be from $50 to $500. These are one-time costs but can make your total cost higher, especially for hard designs.
Additional Testing Services
You might need extra testing services based on what you need. Functional testing is important for making sure your product is good, but it costs more because it needs special setups and skilled workers. Extra checks, like X-ray or first article inspection, add to the total cost. These services help you meet high quality standards and lower the chance of mistakes in your assembly.
Estimate PCB Assembly Cost Step by Step

Figuring out the pcb assembly cost helps you plan your money. It also helps you avoid surprise bills. You need to follow steps to guess the pcb assembly cost for your project. Each step shows you more about where your money goes. This helps you make smart choices.
Identify Required PCBA Testing Methods
First, you need to check what testing your product needs. Different jobs use different rules. For example, IPC rules are for basic pcb testing. Military projects use MIL-STD rules. Aerospace products use AS9100 for quality checks. You must pick testing methods that fit your product and the rules for your industry.
| Testing Method | Industry Standard | Application |
|---|---|---|
| IPC | IPC-TM-650 | Standardized test methods for PCBs |
| MIL-STD | Military | Specific requirements for military applications |
| AS9100 | Aerospace | Compliance with engineering specifications at various manufacturing stages |
- You have to use IPC rules for basic pcb assembly testing.
- You need to use AS9100 rules for aerospace jobs.
- You should add special tests like checking for heat or chemicals if you want your product to last.
Picking the right pcba testing keeps your product safe and good quality.
Calculate Board and Component Costs
You need to find out how much the board and parts cost. Count the price of materials, how many parts you use, and the loss factor. You also need to add the cost for surface mount technology, dual in-line package, and testing.
| Cost Component | Formula |
|---|---|
| Total PCBA Cost | PCB Cost + [Component Cost × (1 + Loss Factor)] + SMT Cost + DIP Cost + Testing Cost + Packaging & Logistics Cost + (Profit & Management Fee) |
| PCB Cost | Laminate Material Cost + Process Cost + Special Treatment Fees |
| SMT Cost | (SMT Placement Points × Unit Price) + Stencil Fee + Setup Charge |
| DIP Cost | (DIP solder joint count × Unit Price) + Wave Solder Fixture Cost |
| Testing Cost | (Flying Probe Test Points × Unit Price) + Functional Test Development Fee + Test Fixture Cost |
You need to check the cost for every part. Add the price for special materials and extra steps. You must include the cost for SMT and DIP steps. You also need to add testing and quality control costs.
Assess Fixture and Equipment Expenses
You need to plan for fixture and equipment costs in your pcb assembly. These setup costs can change if your board is hard or needs special testing. You need to add the price for stencils, test files, fixtures, and programming.
| Expense Type | Cost Range |
|---|---|
| Stencil | $100–$500 |
| Gerber/test file setup | $200–$1,000 |
| Test fixture (ICT) | $500–$5,000 |
| Functional test development | $1,000–$5,000 |
| Programming/firmware burn | $200–$1,000 |

Remember, setup costs for fixtures and equipment can be high for big orders or tricky designs. You need to check if your project needs special programming or firmware burning.
Include Labor and Service Fees
You need to add labor and service fees to your pcb assembly cost. Skilled workers and engineers help with building, testing, and checking boards. You need to look at the pay rates for your area and the type of work.
| Service Type | Cost Range |
|---|---|
| SMT Assembly Labor | $15 – $30 per hour |
| Professional/Prototype Assembly | $20 – $50 per hour |
| Basic Functional Testing | $0.1 – $2 per board |
| Complex Testing (e.g., AOI, ICT) | Based on equipment and man-hours |
You need to add labor costs for SMT and DIP steps. You also need to add fees for testing and checking. Remember, labor costs can change for small and big orders.
Add Additional and Hidden Costs
You need to look for extra costs that can change your pcb assembly cost. These hidden costs can come from advanced testing, quality checks, and getting certified. You must check for add-ons like flying probe or X-ray testing.
| Cost Component | Description | Impact on Cost |
|---|---|---|
| Testing and Inspection Add-Ons | Additional fees for advanced testing methods like flying probe or X-ray. | $0.10–$0.50 per net |
| Quality Control and Certification | Costs for environmental, electrical testing, and safety certifications. | Can add up quickly |
- Assembly and testing costs can be high for special ways of making boards.
- Quality checks and certification can make your total cost go up fast.
You need to add packaging and shipping costs to your final price. Check for any extra fees for quality checks or special inspections.
Tips to Reduce PCBA Testing Expenses
Optimize Test Method Selection
You can spend less on pcb assembly if you pick the right tests. Focus on the parts that are most likely to have problems. Keep the important checks, but skip steps you do not need. For example, in-circuit testing helps you find mistakes early. This means you do not have to fix as much later. Flying probe testing is good for small groups of boards. Functional testing helps more boards work right and lowers repair costs. You can also use fewer probes. Each probe costs between $5 and $15. Using less probes means you pay less for fixing and keeping them.
| Strategy | Impact on Cost |
|---|---|
| Single-sided vs Double-sided | Changes how much you spend and how fast testing goes |
| Minimizing Probe Count | Makes testing and fixing cheaper |
| Standard Fixture Components | Makes the whole testing cost less |
Simplify Board Design
You can save money if your board design is simple. Try to use less layers in your pcb. This means you use less materials and it is easier to make. Plan your design so it is easy to build from the start. This helps you avoid problems when making the board. A simple design means you make less mistakes and spend less time testing.
Tip: Talk with your engineers early to find ways to make your pcb design easier.
Increase Batch Size for Savings
If you order more boards at one time, each board costs less. Big orders spread out the setup and testing costs. This makes each pcb assembly cheaper. Small orders cost more because setup fees do not change. Try to plan your orders so you get the best deal.
| Batch Size | Cost per Unit | Cost Efficiency |
|---|---|---|
| Small | Higher | Lower |
| Medium | Moderate | Moderate |
| Large | Lower | Higher |
Negotiate with Service Providers
You can save money if you talk with your pcb assembly company. Learn about prices and what your suppliers can do. Make good connections with your suppliers. Use a request for proposal to get better deals and services. Ask how you can save money, like by ordering together or changing your design. Always check for problems in your supply chain.
| Negotiation Tactics | Description |
|---|---|
| Market Intelligence | Find out what others pay and what suppliers can do. |
| Supplier Relationship Optimization | Build good relationships to get better deals. |
| RFP Process | Use a request for proposal to get the best price and service. |
| Cost Reduction Strategies | Save money by buying together and changing your design. |
| Risk Mitigation | Make plans for supply problems, like keeping extra parts. |
Use Automation and Efficient Processes
Using machines can help you spend less on pcb assembly. Machines work faster and make less mistakes than people. Robots can work all day and night. This means you make more boards. Automation lets you change jobs fast. You do not need to teach workers every time. Try to remove steps where people fix things or do special tests. Every step you take out saves money. Good quality checks also mean less waste and better trust with your suppliers.
Note: Using machines and better ways to work makes your pcb assembly cheaper and more reliable.
Managing and Forecasting PCBA Testing Cost
Budgeting for Testing
You should plan your pcb testing budget at the start. Make a list of every assembly step and its cost. Use good testing methods to find problems early. This helps you avoid doing extra work and keeps costs down. Work with your supply chain partners to find parts that might not be made soon. Use lean design to cut waste and make better boards. Look at the table below for ways to manage your budget:
| Key Factors Influencing ICT Costs | Practical Solutions | Additional Strategies |
|---|---|---|
| Fixture development and design | Standardize fixtures | Batch process boards |
| Skilled engineering time | Modular programming | Review test coverage |
| Equipment depreciation | Preventive maintenance | Train operators |
| Board complexity | Early test engineer involvement | Design collaboration |
Tracking and Adjusting Costs
You need to watch your pcb testing cost as you build boards. Use software like DMC solutions to change costs right away. These tools help you make custom apps fast. Unisoft’s ProntoTEST-FIXTURE can make cost reports and count solder joints. It helps you with building, fixing, and repairing boards. You can use these tools to see where you spend too much money. Keep records for every batch you make. Change your cost guesses when you find new problems or changes.
Tip: Check your cost reports often. This helps you find problems early and fix your budget before costs get too high.
Continuous Cost Optimization
You can keep pcb testing costs low by using smart ideas. Use the same part packages to make inventory simple. Plan your panel use to waste less. Automated optical inspection makes testing faster and uses less labor. Order more boards at once to get discounts. AI tools can help you find ways to save money faster than people can. Always check if you use parts that are too fancy for your needs. Pick parts that do what you need without extra features. This helps you control your assembly cost.
- Make good testing methods.
- Plan for old parts early.
- Use lean design to waste less.
- Standardize and use machines when you can.
Note: Always working to lower costs helps you make better boards and stay ahead.
You can control your pcb assembly costs if you know what makes them go up. Look at the bare pcb, how you make it, and the parts you use. Follow easy steps to guess your costs:
- Decide what tests you need and plan ahead.
- Get all the facts and work with your team.
- Check your budget often and change it if needed.
Should-cost analysis shows you where your money goes and helps you save.
- Ask your partner to help early in the project.
- Use more than one test to cover everything.
- Make sure your testing plan still matches your goals.
Tip: Try these steps for your next project to keep costs low.
FAQ
What is the most expensive part of PCBA testing?
You usually spend the most on test fixtures and in-circuit testing. These can cost thousands of dollars. Complex boards and custom setups increase the price.
How can you lower your PCBA testing costs?
You can choose simpler tests, order larger batches, and design easier boards. Talk with your supplier about cost-saving options.
Do you need to test every board in a batch?
You do not always need to test every board. For large batches, you can use sample testing. For critical products, you should test every board.
What happens if you skip PCBA testing?
| Risk | Result |
|---|---|
| Missed faults | Product failures |
| Poor quality | Customer complaints |
| More returns | Higher costs |
You risk sending out bad products. This can hurt your reputation and cost you more money.